Sunday, June 5, 2011

It's a MisCake!

My beautiful daughter Meg
(who will say "MOM this is such and OLD picture!!")
but it really isn't - only a year :-P
I  chose this picture because of her face - she makes funny faces, and honestly I know she gets it from her mother 
case and point...

this blog post is about NOT being perfect, and well...if I chose a 'normal' picture, that wouldn't help illustrate my point now, would it?

My daughter has turned into quite the accomplished baker.  I am so happy and proud she's finally found a passion for cooking.  She is a health nut, and eschews oil whenever she can, and happily subs out mashed banana or applesauce for oil/butter without blinking an eye.  The majority of the stuff she makes is yummy.

She called me at work the other day in a panic:

"MooOOOMMMMmm!!!!"

"What happened?"


"I was making this yummy recipe for chocolate chip oatmeal cookies, and I accidently put 10 ounces of milk in the bowl instead of 1 ounce!!!!!"

"Did you mix it in yet?" (If you catch your error before mixing it in, you could pour it out of the bowl and fix your error)


"Yes! and it's really, really thin!! I don't want to throw it out!"


...thinks....then I have a moment of inspiration


"Add another cup of flour, 1/2 cup of sugar, and a teaspoon of baking powder, then put it in a cake pan and bake it  for 30-40 minutes, or until it's done"

My rationale for this was as follows:  Meg put WAY too much milk in a cookie batter.  It was even too thin for a cake batter, so add some flour, a bit more sugar, and some more leavening to make it rise to the occasion.  Heck, it was worth a try, and better than throwing out a bunch of good-for-you ingredients that happened to be in the wrong ratio by human error.  It couldn't come out THAT bad...


"But...then it won't be cookies!"

"Yeah, but if you wanted cookies, you'd have to add 10x more flour, sugar, etc. etc...do you really feel like baking 50 dozen cookies?"


"no.  K' I'll give it a try"

It was in the oven when I got home.  The only thing I forgot to tell her to do was lower the heat to 350.  She had it at 375.  We made that minor adjustment, and I have to tell you, the cake looked pretty darn good.  There were hazelnuts and chocolate chips in it - two of my favorite things.

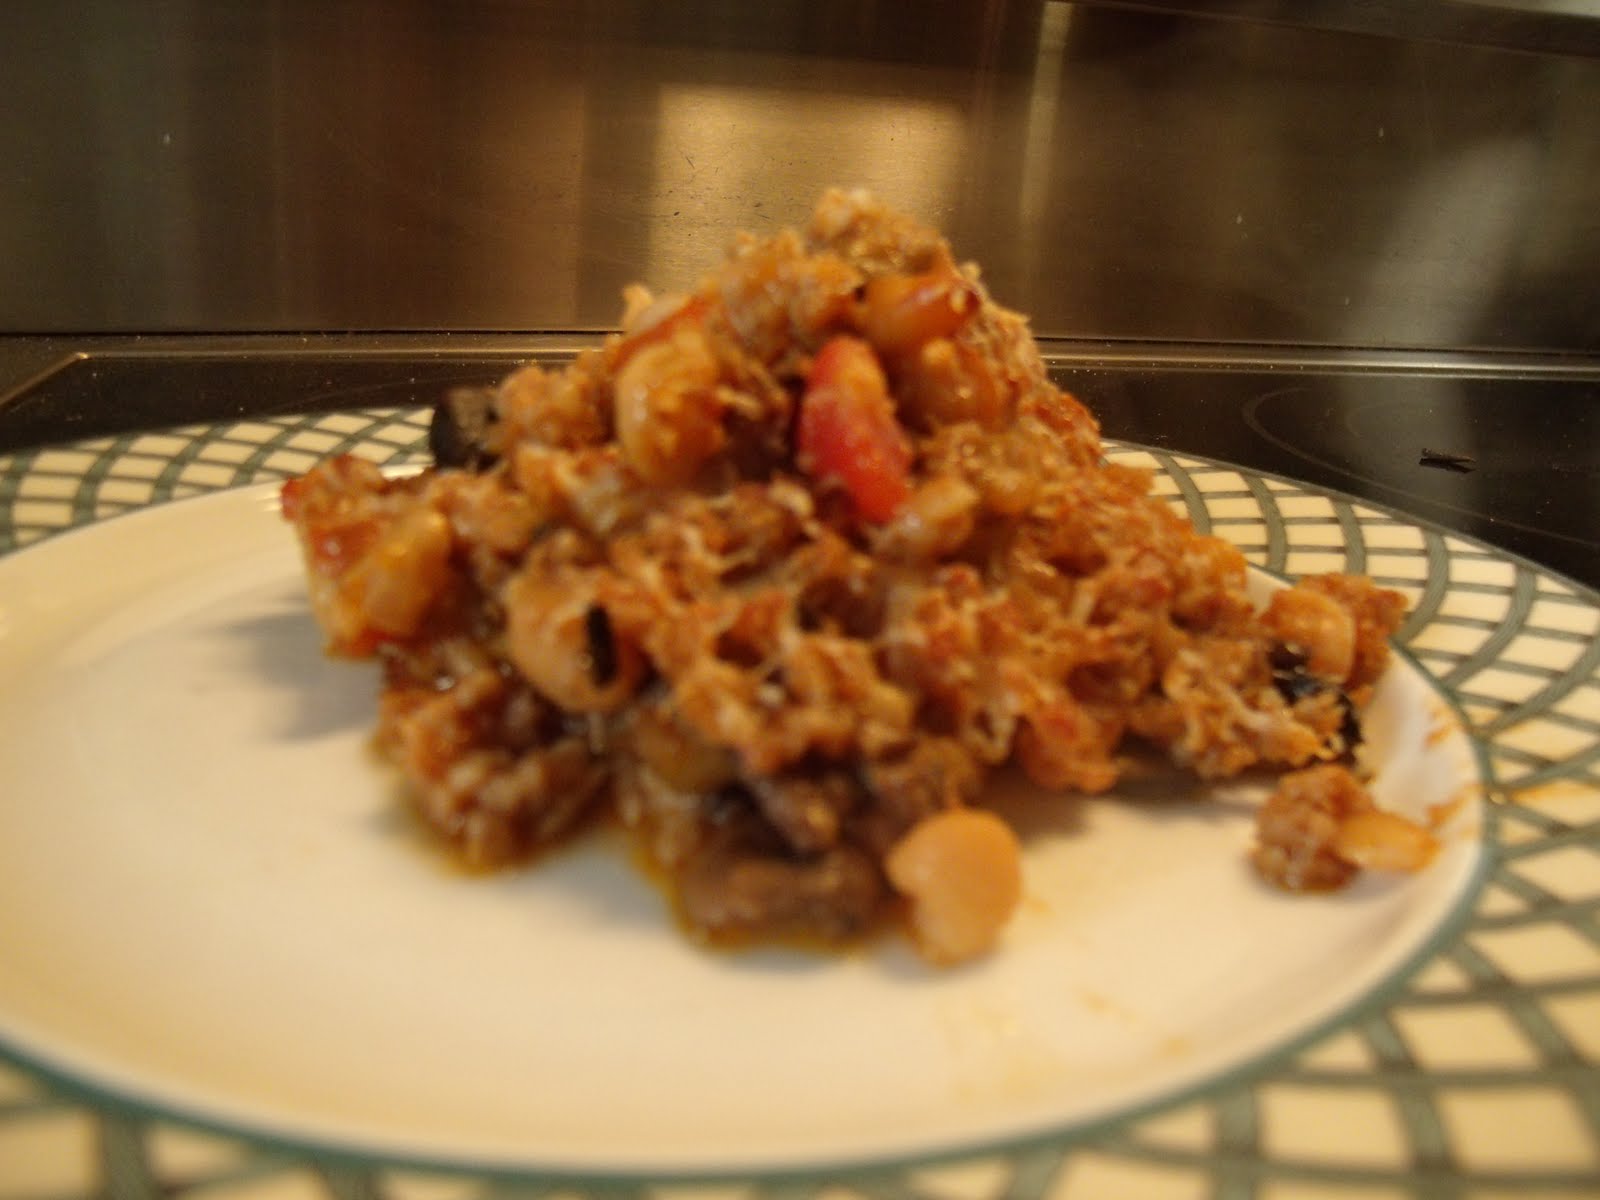
We took it out of the pan, popped it onto a cooling rack, and it looked pretty.  I suggested throwing some confectioner's sugar on top in lieu of icing, and when it was cool, we cut a slice, and it looked like this:

Doesn't it look good?  Let me tell you, it also TASTED good.  It was a chewy cake with chocolate chips and hazelnuts.  Meg coined the name "misCAKE", and I loved it.

THIS is the link to the original recipe she wanted to try, and THIS is the link to the "misCake" :-) if you are daring enough to give it a try.

I don't expect you to try the recipe.  My point of this blog post is to tell you - almost *anything* is worth salvaging, unless it's really gross and disgusting and you wouldn't eat it in a million years - but if it got to that point, that means you finished it without (as my father in law used to love to say) "doctoring it up a little"


Of course, sometimes that is out of your control.  There was only 1 cake in my life that I threw in the garbage, and it was a chocolate buttermilk cake that was dry and tasteless as dirt.  After I pitched it though, my friend Tarri pointed out to me that the crumbs would have been perfectly good over ice cream or stirred into vanilla yogurt.  You see? another salvage opportunity.

If you mess up in the construction stage, take a deep breath and STOP...then THINK...If you added too much liquid, you could pour it out into a measuring cup, and guesstimate about how much you need to pour back in.  If you added too much salt to a sauce, just double the sauce and serve some crusty bread to mop it up with.  If you've already stirred in the ingredients (like Meg did) think about what you are making.  If you were making cookies, and added WAY too much liquid, well then, make a cake.  You know cakes are lighter than cookies, right? So you will probably need more leavening, or something to make it rise.  Baking powder should do the trick.  About a teaspoon would be fine, because most cookie recipes have baking soda in them already.  You will need to thicken up the batter, so add some more flour.  If you add flour, you know you are gonna need more sugar to keep it sweet.  Start with half cup of flour, and 1/4 cup of sugar, and add until you get a cake batter consistency - usually they are sort of pancake-batter like.  Don't be afraid to try it - you may be surprised by the results!

If you mess up in the end stage, don't panic.  You can peel off burnt cheese, put some more on and rebroil it. You can scrape the black off garlic bread.  You can thin out a tomato sauce that looks like concrete with some water or wine.  I would say 90% of the time, there is SOMETHING you can do to save what you are making, if you just stop, think, and don't panic or give up.  Too much pasta for your sauce? use the leftovers for pasta salad, or if you've already thrown it in the sauce, pick out as much of the sauce-free pasta you can, then if you need more sauce - throw in a small can of tomato sauce I keep a couple in the pantry for just this reason and a few more spices and garlic.  No one will even know the difference.  And yes, I *have* picked sauce free pasta out of a serving bowl before!

I have a philosophy in life - I always look at mistakes not as something I did "wrong" to me, "wrong" connotes that I was "bad" sort of like when your dog decides it would be fun to decorate the kitchen floor with garbage, and you discover his artwork and go "BAD DOG!! BAD!!!"  but rather as a lesson that I can learn from, and improve "me".  Each "mistake" makes you stronger, better, and puts you a step up from where you've been before.  I don't care HOW big of a "mistake" you think it is.  This applies to life as well as cooking.  Looking back on all the mistakes I've made, there's always been an improvement in "me", and that's a good thing.

So...next time you mess up - don't fret - stop, think, then act, and you may be happily surprised with the results! (at least in the kitchen LOL)

Wednesday, June 1, 2011

Lemonade NOT out of a can.

Ok...I don't know about where you live, but where I live, it's been hot.  Icky, humid, oppressive, hot.  It was a beautiful spring, and all of a sudden, Mother Nature decided to have a hot flash :-P.  It was 98 degrees yesterday, which broke a previous record of 97 in 1895.  Ugh.

With the sudden onslaught of hot weather, I've had a hankering for cool stuff.  Salads for dinner.  Ice cream, Italian ice, and lemonade.  I usually just buy a can of lemonade in the frozen food aisle, but  I thought "why not MAKE some lemonade?"  Have you ever looked at the ingredients on a can of frozen lemonade?  I can guarantee you at the top of the list is "high fructose corn syrup".  Unless it's organic, that bad boy is not going into MY body.  It's most likely genetically modified, and I'm making a concerted effort to remove *all* GM ingredients from my house.  Yes, this means almost anything that is not organic - unless it does not contain soy, corn, or canola.  If you are not familiar with GMOs, or genetically modified ingredients, you can start your education HERE .  I'm going to stop now, because if I get started, this will be a blog post about Monsanto and GMOs, not lemonade :)

Making your own lemonade is ridiculously easy.  And good.  You also to get to put lots of fun stuff in it - like pomegranate juice, or raspberry juice, or tea, or anything else your little heart desires.  I make mine with a healthy dose of pomegranate juice - which I happen to love.  It also gives the lemonade a pink color, which is pretty!

This recipe is so simple, you don't even need a printable one.  There are just 4 ingredients - sugar, water, lemons, and pomegranate juice.  If you are a purist, omit the POM juice.

What you DO need however, is a juicer.  I have a fancy Jack LaLanne juicer, but honestly, I use my little 99 cent plastic one, and it works JUST FINE.


So, gather about 4-5 good sized lemons, your POMegranate juice, some sugar and you are set!
First, take 1 cup of sugar and put it in 1 cup of very hot water, and stir with a spoon until the sugar is dissolved.
Obviously not dissolved.  See the granules on the spoon?
No granules - the sugar is fully dissolved.

 This will give you 1 1/2 cups of what is known as simple syrup.  This will sweeten your lemonade, and you won't have any undissolved sugar at the bottom of your jug.

While you are stirring your sugar and waiting for it to melt, you can start juicing the lemons.  You'll need about 1 cup of lemon juice.  Use your juicer, and clean those bad boys out.  There shouldn't be much pulp, if any left.  Didn't I tell you this would be easy? *TIP* roll the lemons firmly on a hard surface with the palm of your hand before halving and juicing them.  You'll get more juice out of them - it loosens up the pulp.


Now...grab a half gallon container, pour the simple syrup and lemon juice in there.  I will add about 1/4 - 1/2 cup of pomegranate juice because I like to.  Fill up to the top with cold water, and give a shake.  Voila! Pomegranate Lemonade!


I thought with the hot weather, maybe I should have put the lemonade in a pretty goblet on a table with white linen and a flower arrangement in the background, but I quickly suppressed my Martha Stewart and went practical.  My only nod to Martha was the lemon slice.


This takes no time at all to make - maybe 10 minutes, tops.  You can zest the skin before juicing the lemons, and freeze it for future recipes.  You can put the rinds in your garbage disposal to freshen it, and rub the leftover lemons shells on your cutting boards to freshen them up as well.

Variations:


1.  Juice about 8 limes, and make limeade.
2.  Juice 3 lemons and about 4 limes, and make lemon/limeade.
3.  Add 1/2 cup of raspberries you've pureed in the blender to the lemonade.
4.  Add 1/2 cup of strawberries you've pureed in the blender to the lemonade.
5.  Heck, add 1/2 cup of *any* berries you've pureed in the blender :-)
6.  If you like your lemonade pulpy, just add some of the pulp from your juicer to the mix.
7.  Add equal parts of water and tea (green or black) instead of just water.

This doesn't even last a day in my house.  Hubby and son scarf it down so quick, Meg and I are lucky if we get a small glass.  Be warned though - once you taste the homemade stuff, you will *not* go back to the store stuff.  Ever.


Friday, May 20, 2011

Evolution of a recipe...

I think I mentioned that I enjoy the Cake Duchess .  She has some yummy recipes, mostly sweet well, she is the "Cake Duchess"... she also has some great savory recipes as well...but I digress.

This post is about the "Evolution of a recipe".  I thought that was an appropriate title.  You see, the original recipe is HERE .  I loved the original recipe - it seemed so romantic. I picture an old French woman with a small, glass yogurt bottle measuring ingredients in an immaculate sunlight -diffused country kitchen.  Fresh ingredients adorn a simple wooden table upon which stands a heavy ceramic mixing bowl.  She mixes the batter by hand with a wooden spoon, carefully pours it into a prepared pan, and puts it in the oven.  Then she waits.  The lemony aroma of the cake fills the air while she sits with her cup of tea, absentmindedly petting the grey and white housecat who decided her legs were an enticing maze.  Yes, I'm a romantic - so what are you going to do about it? :-P  The evolution of the recipe started HERE with the Cake Duchess.  She used olive oil instead of canola, and she put a light syrup glaze over the cake before the main icing.  I made this cake using the original recipe, then I  juiced a lemon with my hand juicer (you get SO much more juice that way), added some confectioner's sugar until it was kind of syrupy, then spread it over the cake.  I had enough left over, that I just added more confectioner's sugar for the icing.  Again, another evolution although I must confess, that one was a bit of laziness on my part :)

Now, here's where it really goes out into left field.  I had this epiphany the other night.  I had a boatload of apples from my local CSA (yes I got extra - we love apples, what can I say?) and I really didn't feel like making another apple pie.  Why not...make an apple cake with the yogurt cake base??  ohhh...and wait...why not put a crumb topping on it?  hold on, I'm not done yet..ohhh....and make it without any oil???


See how easy this is?  Do you see where this is going? :)

So...first thing I did was omit the lemon.  I then cut the sugar by half because I planned on subbing out the oil for applesauce. I also cut half the sugar because I was putting a crumb topping on it.  I threw in some cinnamon, and of course, apples :).  I liked the result, and so did my willing cake testers at Breezy Willow Farm.  The cake is dense and moist - this is from the applesauce.  If you want a lighter cake, use half applesauce, half olive or canola oil, or, and even lighter cake use all oil.  Any way the end result is tasty!

This is an easy recipe - you don't need a mixer, a whisk will do fine.  Printable recipe is HERE

Apple Yogurt Cake- serves 6-8

Ingredients:
1/2 cup yogurt
1/2 cup sugar
1 1/2 cups whole wheat flour
1 cup applesauce
1/4 tsp. ground cinnamon
3 eggs
2 tsp. baking powder
1 large apple, peeled and thinly sliced

Topping:
3 tbs. brown sugar
3 tbs. granulated sugar
1/4 tsp. cinnamon
1/4 cup oats
3 tbs. flour
3 tbs. butter, diced fine (cold)

Process all topping ingredients until fine crumbs.  Add 1/4 cup of pecans (optional).  If you don't have a processor (like me) just use your fingers or a fork to blend.

Preheat oven to 350 degrees.  Butter an 8 inch round cake pan, and line with parchment paper.

*side note*  Did you ever see such a huge egg in your life? poor hen!  I only used 2 eggs instead of 3, because that one egg was HUGE.  Good thing I did, cos' look what I found when I broke them open...
 Double yolks in both!  Look how yellow they are! Ya see? this is what you get when you get farm fresh eggs from happy hens! :)  Now...back to your recipe!
Apples, batter, crumb topping.
Mix together the eggs, sugar, yogurt, and applesauce until well blended with a whisk.


Add the dry ingredients and stir until just blended.  

Pour into the prepared cake pan.  Top the batter with the thinly sliced apples, then with the crumb topping. Sorry there is no picture of the unbaked crumb topping - my camera's batteries died, and of course there was not an AA battery to be had in the house! >.<


Bake for about 35 minutes, or until top springs back lightly when touched, or toothpick inserted in center comes clean.  Cool for about 15 minutes on a rack, then turn out onto a plate.  Enjoy!


How much fun was that? :-)  Take the original recipes, see what other variations you could come up with.  I'm thinking a handful of fresh blueberries would taste yummy in that lemon cake...you could throw a bit of nutmeg in the apple cake, or use the oil instead of applesauce.  Sub out maple syrup for the sugar in the apple cake... I'm sure I'll think of some more evolutions from the original (oohhh...raspberries and lemon! yum!!) but for now, try this one.  It's quick, easy, tasty, and you can even sort of justify it because there is only 3 TBS of fat in the whole dang cake, unless you add pecans to the topping :)


Sunday, May 15, 2011

Cassoulet does not rhyme with "bet"

French.  It's French.  And it's pronounced "Cass-oo-lay" or, if you are language impaired, a simple "Cass O'lay" will do.  Although I can pronounce all things French (thanks to 8 years of the language in my public school system) the thought of all those fancy dancy sauces and stuff put me off, too "frou phooey".  I like simple that tastes complex.  Well, I thought I knew French cooking until I read Julia Child's autobiography, My Life in France.  I used to watch her shows as a kid, but none of it really sank in.  She made me laugh with her big voice that increased in pitch and intensity in direct proportion to the glasses of wine consumed during the making of a particular dish.

I loved her autobiography.  It showed me a side of Julia you didn't see on TV.  She was a woman that embraced life and opportunities, even if they weren't always ideal.  She loved France and its people with a capital "L", and they loved her.  Julia showed me that real French cooking isn't all these fancy dishes with ridiculous long sounding names - Sometimes I think restaurants feel the longer the name, the more people will buy the dish and the more they can charge for it.  It doesn't matter if it is really French cooking or not - somehow, by inserting some French words in the description, it sounds ritzier for lack of a better term, and people will think "oooh...it has french in the description - it must be good because I don't understand it! let's buy it" Meanwhile, it's about as far away from French as you can get - a meat with some reduction of one sort, with a demi glaze of another, topped with some sort of confit of another flavor laying on a bed of risotto of ANOTHER flavor, garnished with some veggies yet...ANOTHER flavor.  Ok...tell me really - what am I supposed to taste in this mish mosh?

I was surprised to see that true French cooking is really quite simple.  2-4 ingredients that are in perfect balance with each other to allow the flavor of the main course to shine through.  Wow.  Of course, there are other recipes that have more than 4 ingredients, but it's all pretty simple stuff, like Cassoulet.  It's really a dish eaten by people in the countryside.  You put whatever you have in the pot with some beans (usually white beans) and meat, stuff it in the oven, let it cook, and voila! when you come in from the fields, it's ready and yummy.

I made a shortcut version of Cassoulet the other night - I think next time I might not take the shortcut - although it was very good, the beans from the can were not as flavorful as they would have been, had they been cooking with the sage sausage I threw in there for 3 hours.  The thing about pots like this, is you can use whatever is in your kitchen, with a meat and bean base.  Do you think the French farmers actually said Zut! Je ne prends pas des carrottes! Je ne peux pas faire le cassoulet!  No, they didn't.  They said Ohhh! J'ai les haricots blancs, le lard, et quelques légumes. Cassoulet pour le dîner ce soir!  They used what they had available.  And so can you.  I'll break it down for you.


MEATS
Bacon
Chicken (bone in)
Sausage (sage preferable, but any you like)
Bacon
Pork
Duck
Beef -chuck roast, stew meat, whatever cheap, fatty cut


BEANS
Cannelini (white kidney)
Kidney - any color
Pinto
Fava
Black eyed peas
lentils (any colors)
black beans

VEGETABLES
Potatoes - any kind
Turnips - any kind
Carrots
Celery
Eggplant
1 can tomatoes - diced - with seasoning or without
Parsnips
Spinach (add later)
Broccoli
Kohlrabi
Mushrooms

SEASONINGS
Salt and Pepper
Parsley
Sage
Rosemary
Thyme
Marjoram
Oregano

MUST HAVES
Wine (any color)
Stock (any flavor)
Butter, Olive oil, or bacon fat
Garlic, onions, shallots, leeks, scallions - pick one or more, but at least ONE

Ok...pick anything you want from any of the lists, but you must have at least one item from each list, except the MUST HAVE list of couse.  How easy is that?  I used sage sausage, white beans, tomatoes, mushrooms, eggplant and shallots...Oh...and wine.  Now, I know some of you are getting anxiety attacks because there is NO RECIPE DAMMIT...take a deep breath...exhale... Good!  Now...another deep breath...exhale...Good!  feel better?  I'm telling you, it's impossible to muck this up.

First thing you want to do is throw a bit of butter/oil in the pan and saute your garlic or onions, shallots whatever...add any vegetables they may have a tendency to get soggy if cooked for a few hours, i.e. mushrooms, eggplant, and brown them up to give them a bit of flavor and hold their shape.  If you use bacon, brown it first, and use the fat to saute your veggies in.


SHORTCUT VERSION!
Now, brown the meat of choice.  If you are using spinach or chard, throw it in the pan. Add about 1/4 cup of wine (white or red) cook for a few minutes to let the alcohol burn off, then add 1 can of beans, drained, and about a can of stock of choice, and a can of chopped tomatoes.  Put the whole thing in a casserole dish or pan, sprinkle with some panko bread crumbs that you've tossed in a bit of butter and garlic, then grate some parmesean over the top, pop it in a 375 degree oven until the crumbs are browned and the cheese is melted.  Voila! Très facile, n'est-ce pas?


LONG VERSION FOR THE ADVENTUROUS:
Pour 1/2 cup of wine over it and enough broth to come to cover beans and pop it in the oven and bake for 1 1/2 hours.  Check it every half hour, the beans can soak up a lot of liquid.  Add more broth if needed.  Remove from the oven, and then sprinkle with 3/4 bread crumbs of choice (please make these fresh, not the dried out stuff you get in the store unless you use panko) you can season them if you want, with some garlic, S&P whatever, or leave them plain.  Toss the bread crumbs with 3 tbs of melted butter.  Sprinkle over the top and cook for another 25-30 minutes, or until the topping is crisp and browned.  Serve with a nice glass of wine, salad, and some crusty bread, and in the words of the immortal Julia Child - Bon Appétit!*


*NOTE*
You can use canned beans, but if you use dried, they will take on the wonderful flavors of the meats, seasonings, and veggies.  Please, please please wash them thoroughly before tossing them in the pot.  Beans are dirty.  They don't really get rinsed in their processing, because it can start fermentation, or they can get moldy, so they are dirty.  If you don't believe me, grab a Q-tip and a bean from the bag, moisten the Q-tip and wipe the bean.  That should convince you.  Because you are cooking this for a few hours, you really don't need to presoak the beans, and lentils never need presoaking, they cook pretty quickly.  Of course, if you are a Crockpot Queen like Tina, you can just throw everything into the Crockpot and cook 6-8 hours. :-) *


Interesting History lesson -


The French usually use haricots blanc beans in their cassoulet.  I found various websites that said it was hard to translate haricots blanc into English, but I found a French website that explained the origin of haricots blanc, which I found amusing.


For all the "difficulty" they have translating haricots blanc into an English equivilent, in reality, the bean came to Europe in the 16th century from Central America, courtesy of the Spanish and Portugese explorers.  Basically, haricots blanc is simply a white kidney bean :-)

Thursday, April 21, 2011

Memories, Traditions, Nostalgia

Lately I've become enamored of the Cake Duchess , and not just because she has some yummilicious sweets - she also married an Italian, has Italian in laws, is Italian, and loves to cook Italian.  And I love all things Italian (Perhaps I lived in Italy in a past life).  Montepulciano is on my bucket list, as well as Florence and Venice.  Rome, I could care less about.  One of her last posts spoke about how she and her mother in law love to bake.  She also mentioned they were going to make Easter Bread.  That triggered memories for me.

My mother's side of the family is Estonian.  If you don't know where Estonia is, you are most likely in a majority, since it's been taken over numerous times by numerous countries (including Denmark, Sweden and twice by Russia) yet they still maintain their fierce sense of independence and language.   I've never been there, but I would like to see Tallinn the capital city, that's where my grandmother was born.  My nana (as I called her) was a beautiful woman - even in her 80s she barely had a wrinkle on her face.  When she was younger, she was gorgeous with a head of auburn hair.  My grandfather was blonde and blue eyed.  I never met him - he died when my mom was in college.  Here is a passport photo of them - pretty cool!
(*note* "Lapsed" is Estonian for "Children" - it's pronounced "lap-sehd")  My nana was 23 when she came here, my grandfather was 37.  They came over on the RMS "Homeric" which sailed out of Southhampton, England, and landed in NYC.  If you want to know what you got as a meal - here you go:

And here is a picture of the happy couple taken in Estonia.
What this is all leading to is my nana's "mamu saia" (mahmoo SIGH yah) (Estonian for "raisin loaf").  This was the only bread she had in her house.  We ate it for breakfast, lunch, dinner...sometimes it had raisins, sometimes it didn't.  I remember she kept it wrapped in a piece of foil, and would slice off whatever she needed - whether it was toast at breakfast, a big slab with butter and cinnamon sugar to take to the beach,  or a piece to eat with some stew at dinner.  I loved that bread, and  I always associate it with my nana.  At Christmas it would be shaped in a wreath and sprinkled with sugar and ground almonds; at Easter it would get the same transformation - sometimes even some hard boiled eggs would decorate the top.

When I take a bite of that bread,  I'm 4 years old again sitting at Nana's kitchen table eating mamu saia while Nana and my mom chatter in Estonian.  Do you have any food that triggers memories for you?

I want to share the recipe with you.  It's not difficult to make, especially with the rapid rise yeast.  The proportions on the flour are not EXACT - however, you can't really muck it up :)  The main thing to remember with bread is...do NOT make the water too warm, or the bread won't rise.  Err on the side of tepid really.  70 degrees is not that warm.

So here you go - make some for Easter!  I hope you enjoy it as much as I do, and I hope it will start bringing YOU some happy memories as well.  Printable recipe is HERE

Nana's Mamu Saia (Estonian raisin bread)

Scald: 1 1/2 cups of milk.  Let it COOL down (This is one part where you can mess it up.  If the milk is too hot when you add it to the yeast, the yeast will NOT rise.)
Add: 1 tsp. salt, 1 tsp. cardamom seed crushed, 1 pkg of yeast you dissolved in 1/4 cup warm water (again, this should be lukewarm, not anywhere near the temperature of say...water you wash your hands or dishes with)
Add:  Enough flour to make a pancake-like batter. (about 2 cups) Cover the bowl and let rise in a warm place until bubbles form, about an hour.

Meanwhile...
Cream butter (about 3/4 cup) to which the grated rind of 1 lemon has been added.  Beat in 1 egg and about 6 tbs. of sugar.


Your yeast batter should now look like this:
bubbles! yeast is working! :)


Kneading dough
Stir the yeast batter down, add the butter/egg mixture, then sufficient flour to make a pliable dough.  For me it was about 3 cups.  Don't worry if the dough sticks to your hands - just flour them, or add flour by the handful to the dough until the dough no longer sticks to your hands.  Now knead it!  You can't over knead the bread - get out your aggressions, slam it on the table - BAM!!!! that's for whoever left all those dirty dishes in the sink - BAM!!!! that's for the jerk that cut me off on I-95 - fold the dough, punch it down, and the more you do it, the more you will notice it getting not so sticky, and smooth and elastic.


At this point, you could knead in some raisins if you want.  1/2 - 3/4 of a cup, depending on how much you love raisins.  My son Ben, stated he didn't "like" raisins, so I omitted them.  I made 1 HUGE loaf, but you could make two normal size loaves.  I divided the dough into 3 pieces, rolled them out, and braided them.


I then shaped it into a large loaf, covered it once more with a dish towel, and let it rise again for about half an hour.  Preheat the oven to 375 degrees.
Pre-rising
After rising with egg wash
Once it rises (almost doubles size) brush the loaf with the yolk of an egg, and then (if you want) sprinkle some ground almonds and turbinado sugar on top - or just plain granulated sugar.  Now put that bad boy in the oven, and immediately turn the heat down to 350 degrees.  Bake for 30-45 minutes, or until the bread is browned, and sounds a bit hollow when tapped.  It should look something like this:

You can remove to a rack to cool, or dig in and slather a piece with some butter and enjoy!  This bread keeps quite well simply wrapped in a piece of aluminum foil.

*Note on Cardamom*
If you want the most aromatic flavor, please buy the pods and grind the seeds yourself.  If you don't have a mortar and pestle, you can do this easily with the back of a soup spoon on a piece of waxed paper.  The scent and flavor it gives to the bread is so much better than the stuff that's already ground.  It's a little pricey, but if you like to cook Scandinavian or Indian food, you'll use it up.  Here's what the seed pods look like :


Saturday, April 16, 2011

Sweet potatoes done right....

 I realize most of you are hooked on those sweet potatoes aka yams you get every Thanksgiving - you know...the ones covered in marshmallows or brown sugar, or some other confectionary concoction that all but drowns out the real taste of sweet potatoes and gives you a sugar high that only copious amounts of Thanksgiving turkey ingested to the point of gluttony can bring you down into a comatose post-prandial lump on the couch.  OK...maybe I exaggerated JUST a little, but I never liked sweet potatoes, most likely for that very reason - if Mother Nature was kind enough to give us a sweet vegetable, WHY THE HECK DO YOU WANT TO PUT MORE SUGAR ON THEM??!! what is the point? No offense to those yam aficianados that really love marshmallow sweets, but HOW does that make them "better"?

Oh...and FYI - Sweet potatoes and yams = same thing - just depends on what side of the tracks you come from - North or South :-)

When I joined my local CSA, Breezy Willow Farm, I got a lot of sweet potatoes.  My daughter immediately pounced on them and pronounced them delish.  This is the same daughter mind you, that for about 18 years I couldn't get even the faintest bit of interest in cooking, other than to make a batch of boxed brownies.  Once she hit 19 though, the cooking gene must have kicked in, because she is turning into quite the accomplished cook.  It makes a mom proud :)  I was happy to give her my sweets, because I didn't "like" them (you see where this is going, don't you)  One day she sent me a recipe she had Stumbled Upon, "Crash Hot Sweet Potatoes" and they sounded like they would be really, really good.  They were savory - oh yeah, there was the obligatory brown sugar, but that was only to put a nice carmelized coating on them and to lull you into a false sense of security until you bit into them and an explosion of spice assailed your senses.  I had to try them.  I made them, popped them in the oven, and thus began my love for sweet potatoes.  However...as good as they were, I did have to peel, cut, parboil, smush, brush, sprinkle, turn, brush, sprinkle, etc...and sometimes that's just too much work.  So, I decided to do something different.  Easier.  Much easier.


I peeled the sweet potatoes and diced them up.


Put them on parchment paper (I am now addicted to using parchment paper - SO easy to clean up , and nothing sticks) drizzle with some olive oil - toss.


Now, mix all the brown sugar/spices the recipes tells you to mix up (I call it a 'rub') and take that spice rub and sprinkle liberally over the potatoes.  Here are the ingredients, but I urge you to visit Donalyn 's blog and look at the original recipe, plus all the other neat stuff she has!

1 & 1/2 tablespoons light brown sugar
1/2 teaspoon kosher salt
1/2 teaspoon ground cumin
1/2 teaspoon New Mexico chili powder
1/2 teaspoon smoked sweet paprika
1/4 teaspoon onion powder (I didn't have any of this, so I just used 1/2 tsp. garlic powder)
1/4 teaspoon chipotle chili powder
1/8 teaspoon granulated garlic


 Roast in a 400 degree oven for 10 minutes, then toss them around a bit to turn, sprinkle a little more rub over them, cook them for about 15 minutes more and THIS is what you wind up with after about 20-25 minutes:


Absolutely amazing.  I had them for lunch three days in a row :-)  Much less time than the original, no extra pots to clean- I love the original don't get me wrong, but I love this version more :-)   I didn't have onion powder the recipe called for, so I used garlic powder instead.  Don't be afraid to experiment.  Buy the smoked paprika - it's a nice staple to have.  If it's pouring rain or the dead of winter and you want that smoky grill flavor, sprinkle some on the burgers you are frying in a pan.  Put some on some corn you just roasted on the BBQ, throw it in chili.  Same with the Chipotle chili powder.  You can find that in the spice aisle of your local supermarket, and I happen to *love* chipotle.  It's nothing more than a smoked jalapeno, but you get a sweet, smoky hotness that is smoother than the original.  Buy it.  You won't be disappointed.  You can use any chili powder you have if you don't have some from New Mexico.  I was lucky enough to have gone to Santa Fe in October and I brought back some mild green chili powder (which is probably normal here - in Santa Fe if you order anything that's "mild" - it has a kick - they KNOW hot peppers) Here is the link to El Potrero Trading Post.(aka Vigil Store)  You can get a half POUND of chili powder for only $4.50.  Email them for prices for shipping - they will ship in flat rate boxes.  Be warned though - the "mild" chipotle chili powder is HOT so I am sure the hot is nuclear.  I tried a bit on my pinky finger and I swear a few beads of sweat broke between my brows and my mouth burned for about five minutes.  That's just the way they roll in New Mexico :).
(This wonderful photo is from Kit's flikr page )
So...give these roasted sweet potatoes a try.  If you don't have all the ingredients don't be afraid to use what's in your spice cabinet.  Store the leftover "rub" in a baggie - it keeps well.  I made up double the recipe just so I could have enough to last me for a while.  Adjust the spices to the heat you want - if you want more heat, use a hotter chili pepper...more smokiness, up the chipotle (heat and smoke) or the smoked paprika.  I don't know what spices Meg has in her cabinet, but I can tell you, there isn't much LOL, yet these potatoes still came out yummy and savory.

Enjoy!

Saturday, April 9, 2011

Ok yeah, so I took a break - I return bearing COOKIES! :)

Somehow life got busy, the CSA ended for the season, and I was forced to go to the grocery store to try and find SOMETHING that bears a resemblance to a tasty vegetable.  Even the organic wasn't the same.  My CSA has an "early bird" that goes from March - May, then we get only a week's break before the June - November one starts, so like Persephone, I have emerged from the Hades of GM seeds and CAFO meats, and come back into the light of organic and IPM...which has nothing to do with my blog post today, because it's all about cookies.  (must be my ADD kicking in)

YEARS ago "BK" (before kids) I lived in NJ in an apartment in Weehawken.  I was literally 2 minutes from the Lincoln Tunnel, which if driven through, will dump you downtown in NYC.  This was an easy escape route for us after the bars closed and a late night meal was warranted.  We'd head into Chinatown and hit up Wo Hop's, a  Chinatown icon.  Cheap food, surly waiters, family style dining (shared tables) downstairs.  Still the best and freshest chinese food I've ever had.  Afterwards we'd walk down Mott Street, where everything stays open to all hours of the night.

Sometimes we'd stop at one of the Chinese bakeries for dessert.  They had a whole bunch of stuff - moon cakes, bean cakes, and a couple of things I would usually alternate - a sort of rice krispie cake, but made with crispy noodles and honey and sesame...and a large golden, crumbly, chewy, melt-in-your-mouth cookie that I simply called a "dot" cookie.

For some reason a hankering for the said "dot" cookie reared its ugly head, so I decided to google a recipe - surely SOMEONE knows how to bake these gems?  Hrm...I did find something close in flavor and texture, but not color.  I guess I'll have to experiment a bit more and post my results *grins* difficult, I know, but someone has to do it.

These are pretty easy to make.  I took a recipe I found and altered it (since when have you known me to *ever* make a recipe exactly the way it's written?)  I used half shortening and half butter, because a) I couldn't stand the thought of all that Crisco going right to my butt which is ever expanding since I hit the big 5-0, and b) I wanted the butter flavor.  This was a wise decision :).  I also used equal parts of cake flour and whole wheat pastry flour, because I wanted the cookies to have that tender, melt in your mouth texture.  If you are wondering about the differences between all these flours (who knew there were so many?) here is a good LINK that will make you a more informed baker.

I don't usually bake.  My mom loves to bake.  To me it's more of a chore than "fun".  I haven't yet learned all the nuances of baking, which is definitely more of an art form than simply cooking a meal.  Perhaps "art" isn't a good descriptive term - "scientific"  might be more appropriate.  If everything is not in the correct proportions, you could have disastrous results.  Feel like leaving out the egg in that cake batter? don't try it.  Want to omit baking powder and use baking soda instead? better not sub it out teaspoon for teaspoon or you may wind up with matzoh instead of sheet cake.  That being said, let me present my version of these yummy cookies...I didn't mess with the dangerous stuff :)
I had enough cake flour to use in this recipe, but I thought the Whole Wheat pastry flour would give an added texture (crumbly, tender) that I was looking for.  I think it did.  Please forgive the lack of pictures, but this recipe really is pretty straightforward.  The hard part is keeping them around.  I had to ration myself to one a day and put the container out of sight in the dining room.

So I give you the recipe, printable as always,  HERE:

Chinese Dot Cookies - Yields about 24
inspired by Vicki's recipe on allrecipes.com
 Ingredients:

3/4 cup Crisco (please do not omit this - needed for texture - I know the thought of putting pure lard in your cookies grosses you out, but sometimes it's a good thing - trust me)
3/4 cup butter, softened
1 1/2 cups white sugar
1 egg
1 tsp. vanilla
1 3/4 cups of cake flour
1 3/4 cups whole wheat pastry flour
1 1/4 tsp baking soda
3/4 tsp salt
1/4 cup ground walnuts
can of fudge frosting (freeze the leftovers)

Directions:

1.  Cream butter and sugar together until light and fluffy.  Don't be afraid to beat it a few minutes.  Add the egg and vanilla, beating again til' well combined and fluffy.

2.  Add the flours, baking soda, salt and stir into creamed mixture.  The dough will be a bit sticky, you can add a bit more flour, but not too much.  Best is to coat your hands, lift the dough out of the bowl, and gently form into a log about 15 inches long.  Put a piece of saran wrap on the counter the length of the log plus a few inches.  Sprinkle the walnuts on the wrap, and roll the log around until coated, then roll up in saran wrap and place in fridge for an hour. (or more if you have stuff to do)

3.  Preheat oven to 350 and lay some parchment paper down on your cookie sheets.

4.  Unwrap the dough, slice about 1/2" thick, place 1 1/2 inches apart on cookie sheet and bake for 10-15 minutes.  They should be slightly golden around the edges and appear dry, not wet.  Allow to cool for a minute or two before removing to cooling rack.

5.  When cool, place a dollop of icing in the center of each cookie.  I didn't melt the icing, but next time I think I will to see if I can get a smoother texture rather than the hand made swirls on mine.  Just be sure to allow them to dry.  Store covered at room temperature.

The original recipe stated serves 12, but these cookies are large, and I got two trays which is closed to 30+ cookies.

The cookies are absolutely yummy.  Crumbly, tender, yet with a chewy bite - hint of butter, not too sweet, and fudgy goodness in the center.  What more could you ask for? :)